For AI novices, deploying an AI software from source code can be challenging. With a portable package, it becomes as simple as downloading, extracting, and double-clicking, significantly lowering the barrier to entry. However, sometimes a ready-made package might not be available or up-to-date. In such cases, you can try creating your own package and sharing it with others.
Due to the typically large size of AI project models, combined with GPU support, even when compressed into 7z format, the file size can far exceed 5GB, making uploading to cloud storage and general storage difficult. Therefore, I will no longer be creating portable packages. If you're interested, you can create your own package following this tutorial and share it with others.
This tutorial uses F5-TTS as an example, creating a portable package on Windows 10 using Python 3.10. The main steps are as follows:
- Download the Python 3.10 embed version (not the exe installer, but a zip archive).
- Install pip and set dependency lookup paths for the project.
- Download the F5-TTS source code.
- Install F5-TTS's dependencies.
- Create a one-click startup script and set the model directory to the project directory.
- Configure a proxy and download the models.
- Execute a cloning task once to complete the download of Whisper and other models.
- Compress into a portable package.
- Creating Portable Packages for Other AI Projects
Preparations Before Starting:
First, create an empty folder. To avoid errors, it's recommended to create an English folder on a non-system drive, such as D:\f5win. This article uses D:\f5win as an example. Then, create another empty folder named runtime inside this folder to store the Python 3.10 embed version files downloaded later.
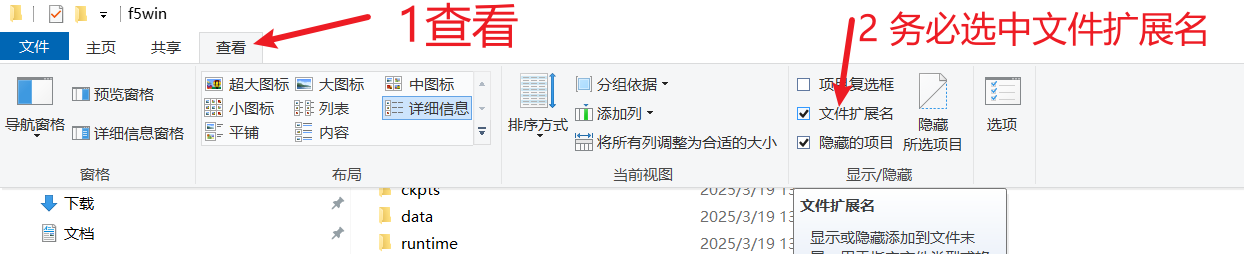
Before starting, be sure to click "View" in the folder navigation bar and then check "File name extensions," otherwise errors are likely to occur in subsequent operations, especially for those unfamiliar with extensions.
1. Download the Python 3.10 embed version
Important Note: Here, we are downloading the embed version, not the exe installer. This version doesn't depend on your machine's Python environment, so even if you have Python installed, you still need to download this version.
Download Link: https://www.python.org/downloads/release/python-31011/
After opening the webpage, scroll to the bottom and click
Windows embeddable package (64-bit)to download. After downloading, you will get a zip archive.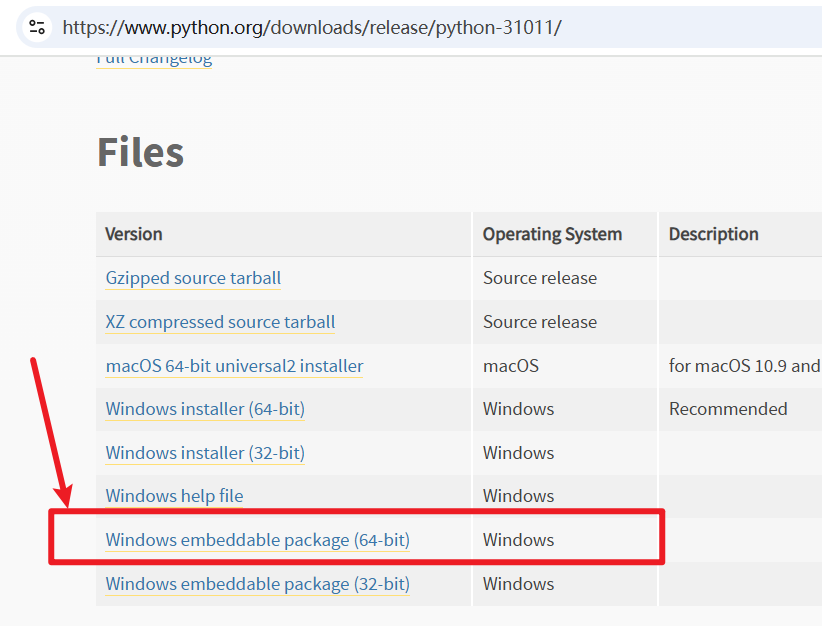
Be sure to download this version; don't make a mistake!
After downloading, extract the zip archive and copy all the files inside to the
runtimefolder you created earlier. As shown below: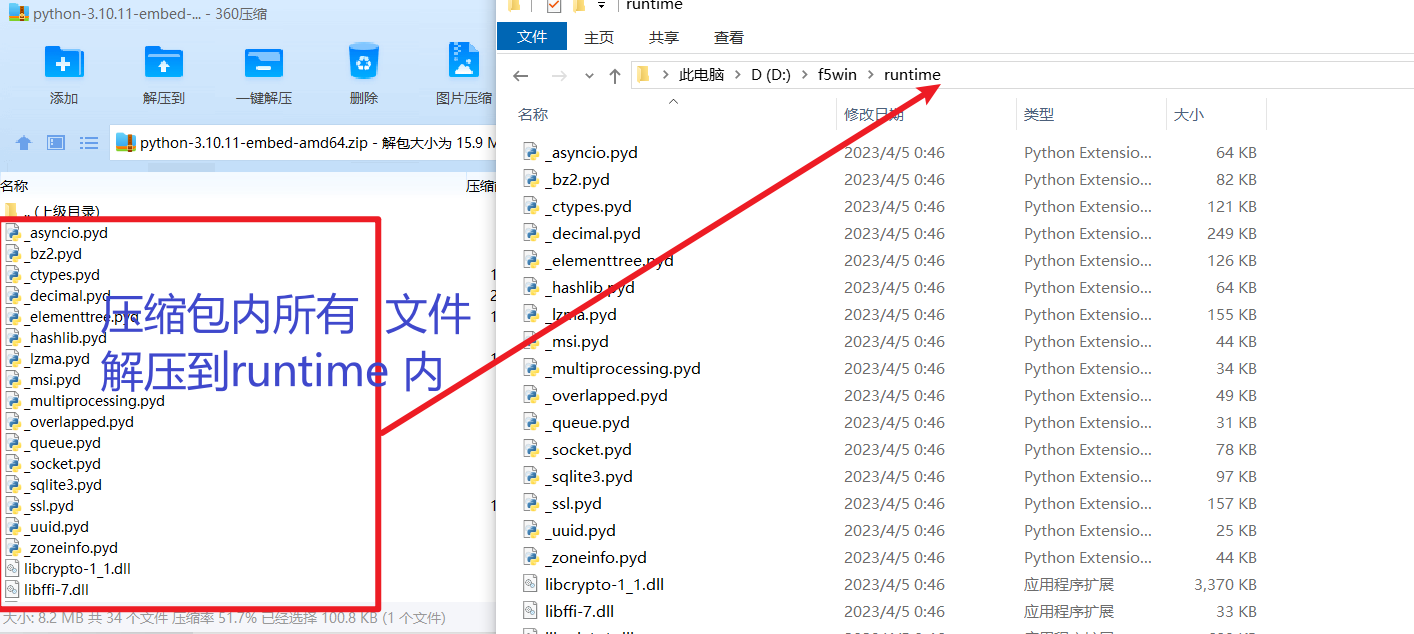
2. Install pip and Modify Package Lookup Paths
The embed version of Python doesn't include the pip module, so you need to install it manually.
Install pip:
Open this address: https://bootstrap.pypa.io/get-pip.py
Right-click and save as, saving the file to the
runtimedirectory. After saving, theruntimefolder should contain a file namedget-pip.py.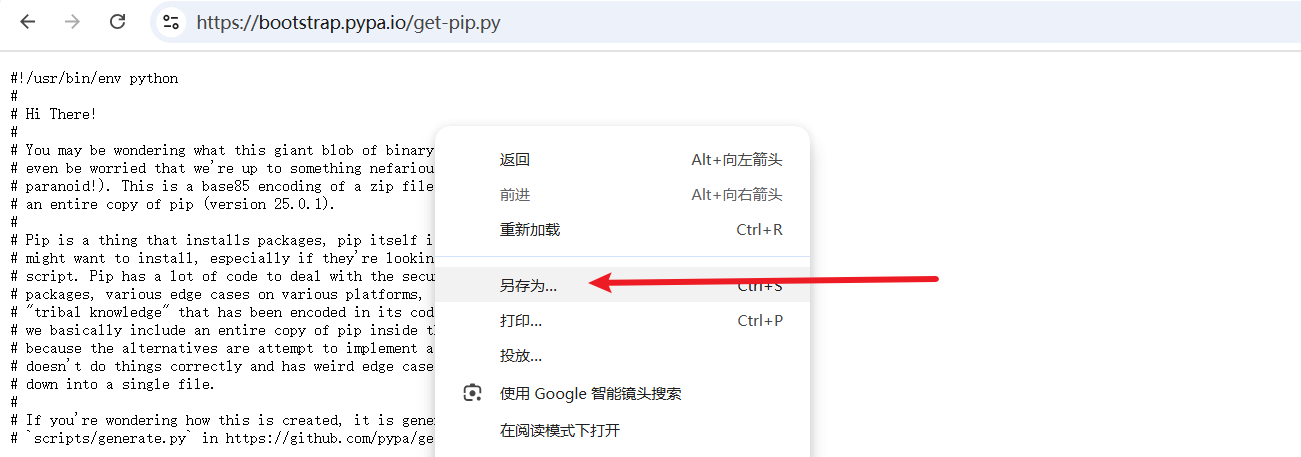

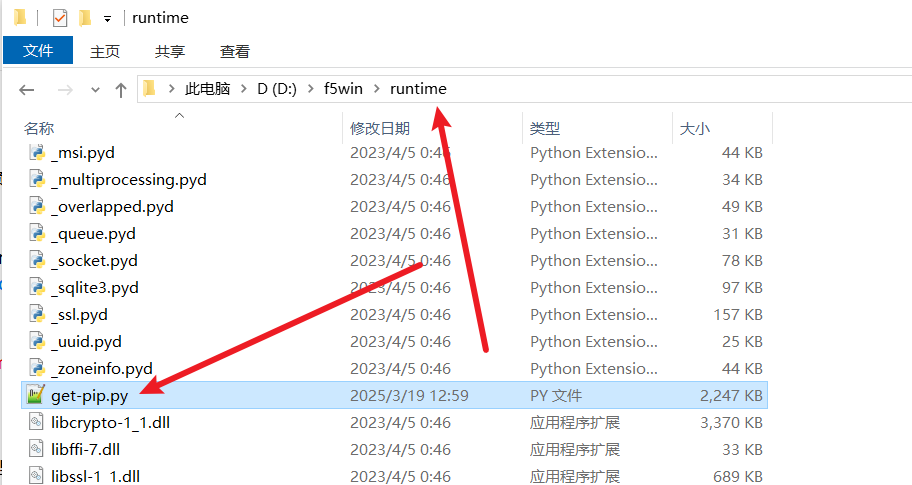
Enter
cmdin the address bar of theruntimefolder and press Enter to open a terminal window (black window).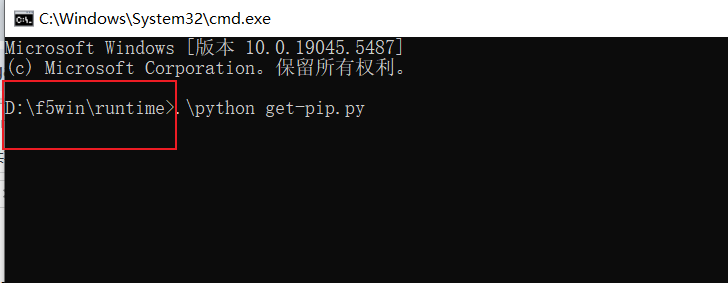
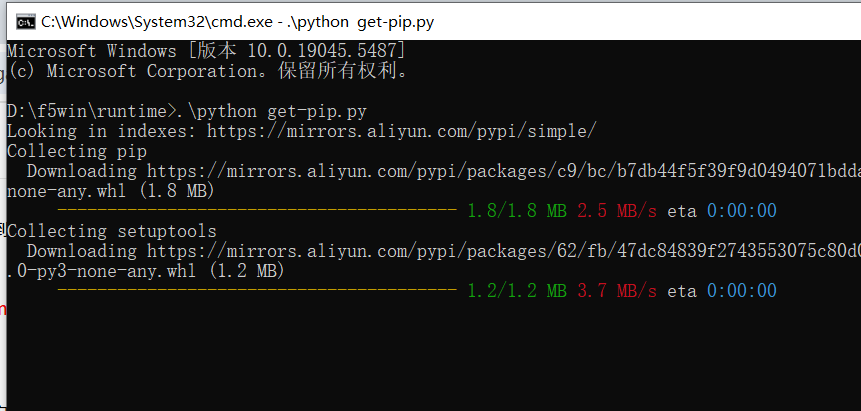
Enter the command
.\python get-pip.pyin the terminal window and press Enter. Be sure to note whether the current folder address displayed by the command line is within theruntimefolder; otherwise, it will cause an error.Wait for the installation to complete...
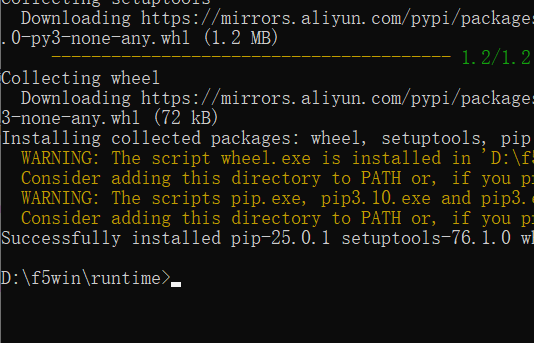
The pip module is installed successfully!
Modify the
python310._pthfile:Find the file named
python310._pthin theruntimefolder, right-click and open it with Notepad.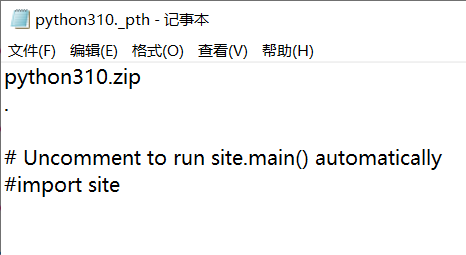
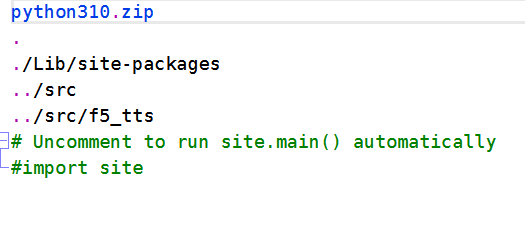
On the line below the dot symbol
.on the second line, add the following three lines:./Lib/site-packages ../src ../src/f5_ttsSave the file. The modified file content should look like this; please check carefully to ensure it's correct:
3. Download the F5-TTS Source Code
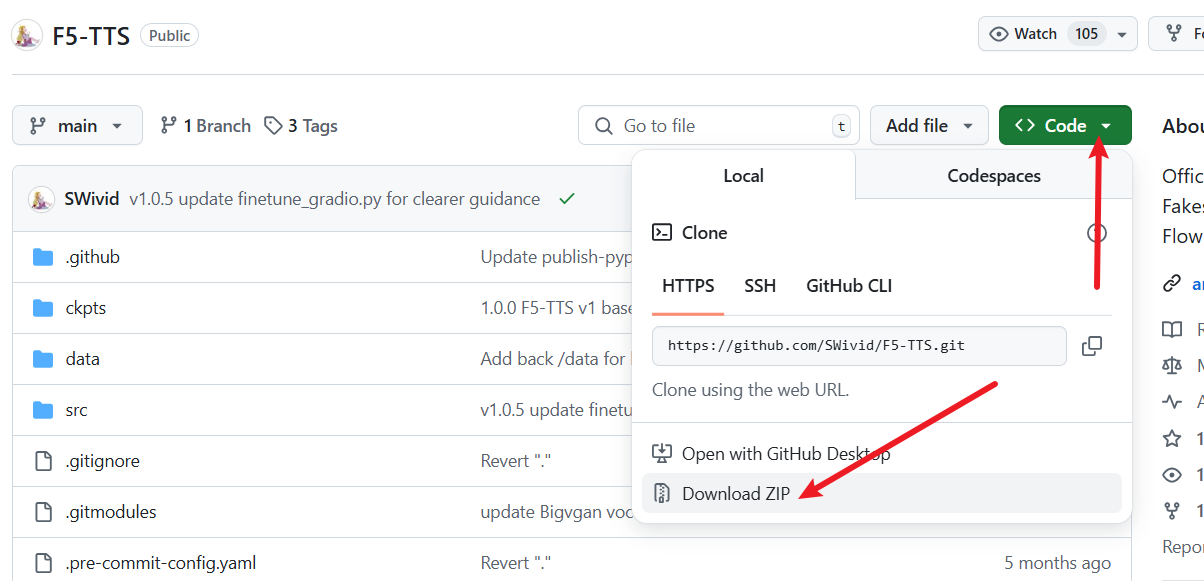
Open the F5-TTS project's GitHub repository: https://github.com/SWivid/F5-TTS
Download the source code's zip archive.
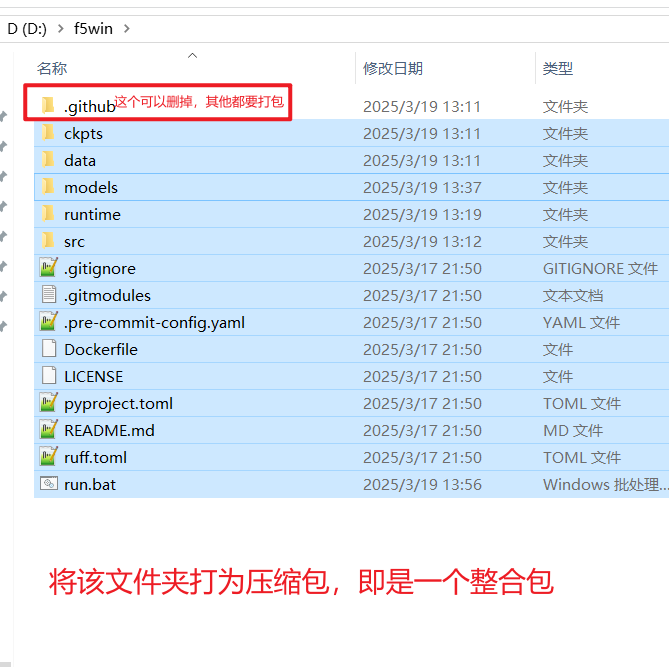
Extract the downloaded zip archive and copy all the files from the
F5-TTS-mainfolder to theD:\f5winfolder. Note: Copy the files inside, not the entireF5-TTS-mainfolder.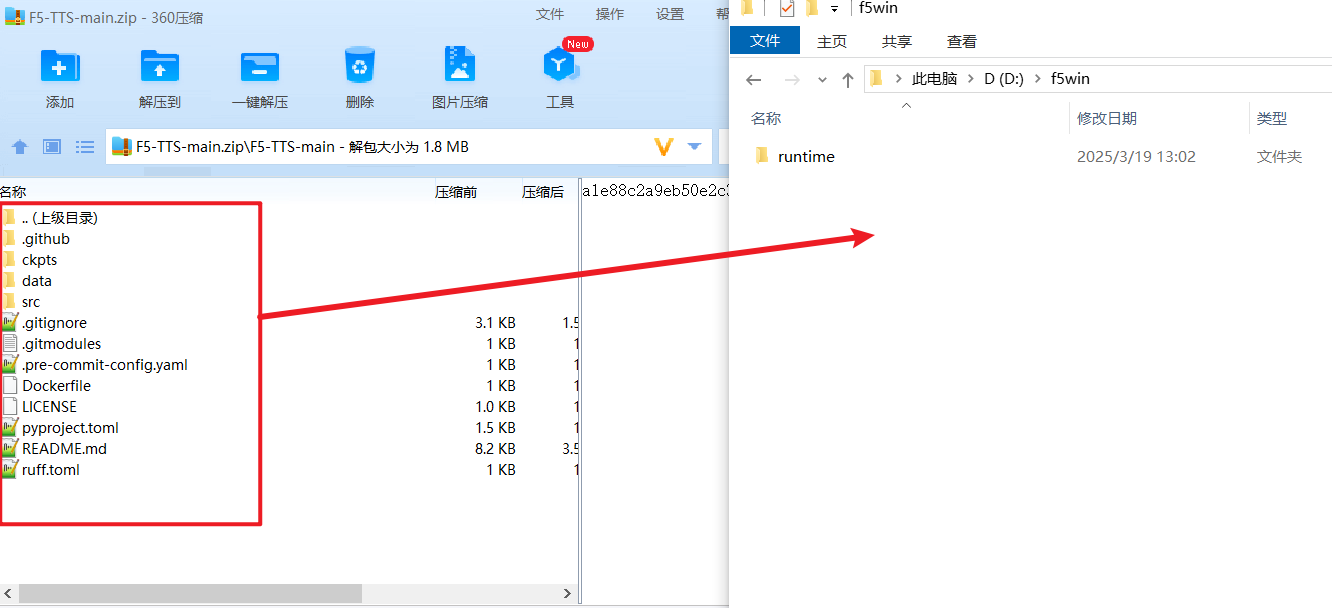
After extraction, the content of the
D:\f5winfolder should look like this: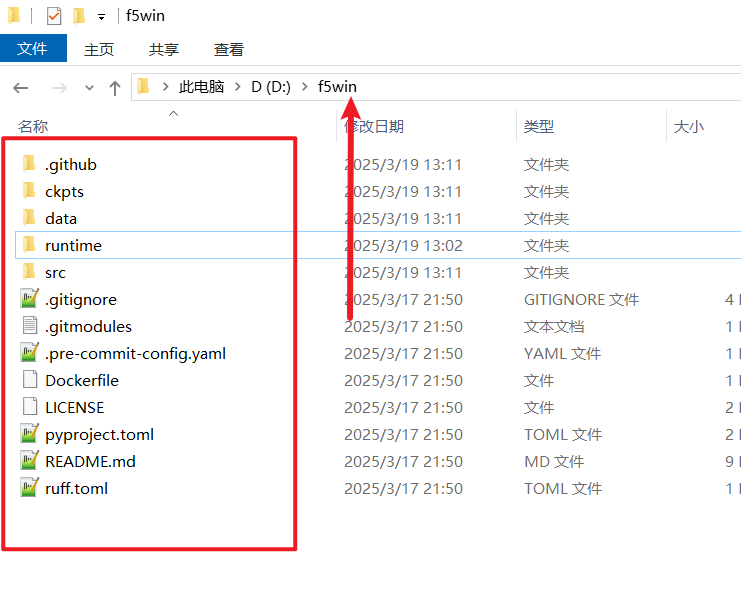
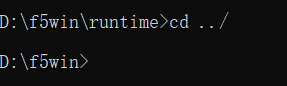
Return to the previous CMD window
Still in the same terminal window, execute the
cd ../command to ensure that the address before the command line has been reduced by theruntimecharacters, becoming as follows. The following operations must be performed in theD:/f5windirectory.
4. Install Dependencies
Return to the cmd terminal window and confirm again that the path displayed by the current command line is
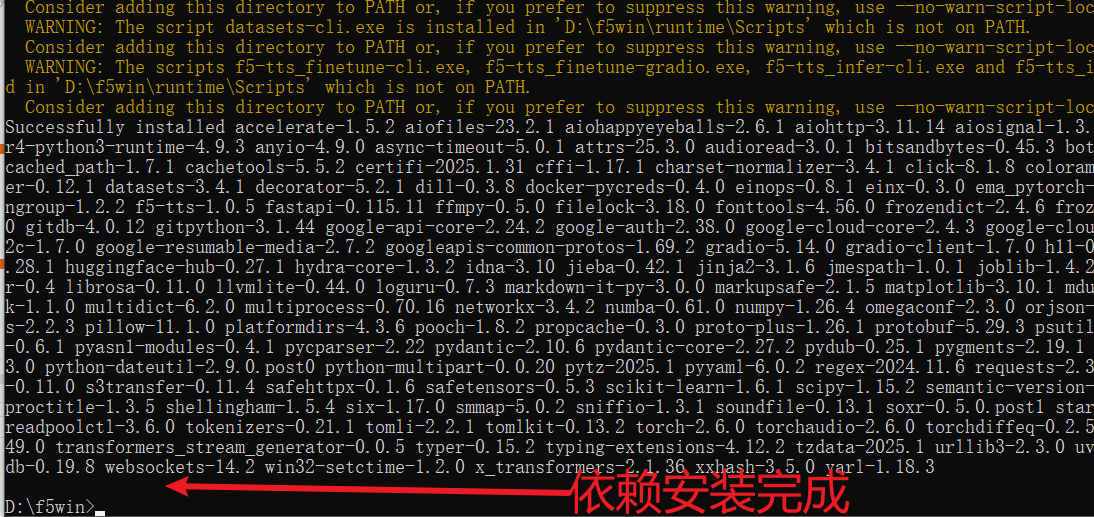
D:\f5win(withoutruntime).Execute the following command to install dependencies (note the spaces and dot symbol):
.\runtime\python -m pip install -e .
Wait for the installation to complete...
- If you want the portable package to support NVIDIA graphics cards (optional): Continue to execute the following command to install the CUDA version of PyTorch and torchaudio (note the spaces and dot symbol; the command cannot be split into multiple lines):
.\runtime\python -m pip install torch==2.4.0+cu124 torchaudio==2.4.0+cu124 --extra-index-url https://download.pytorch.org/whl/cu124
5. Create a One-Click Startup Script
By default, models are saved in the user directory on the C drive. To facilitate integration, we need to download the models into the portable package.
- In the
D:\f5winfolder, right-click -- New -- Text Document to create arun.txtfile. Open it with Notepad and enter the following code:
```bat
@echo off

chcp 65001 > nul

set "HF_HOME=%~dp0models"
set "MODELSCOPE_CACHE=%~dp0models"

echo HF_HOME: %HF_HOME%
echo MODELSCOPE_CACHE: %MODELSCOPE_CACHE%

"%~dp0runtime\python" -m f5_tts.infer.infer_gradio  --inbrowser

pause
```
The script above means: Save the models in the
modelsfolder in the current directory, then start the web interface and automatically open it in the browser.
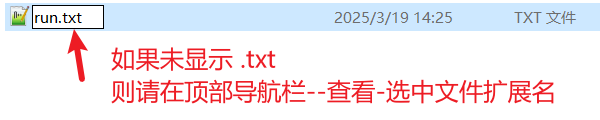
After saving the file, rename
run.txttorun.bat. A warning will pop up; select "Yes." If no warning pops up, it means you made a mistake in modifying the extension. Please go back to the "Preparations Before Starting" section at the top of this article and select "File name extensions" as instructed.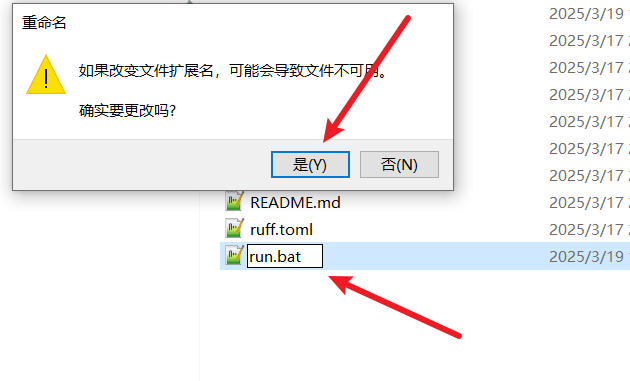
6. Configure Scientific Internet Access
Due to the limitations of the domestic network environment, you cannot directly access Hugging Face (huggingface.co), where the F5-TTS models are located. Therefore, you need to configure scientific internet access and set it as a system proxy.
For example, if the tool is v2ray, you can set it up like this:
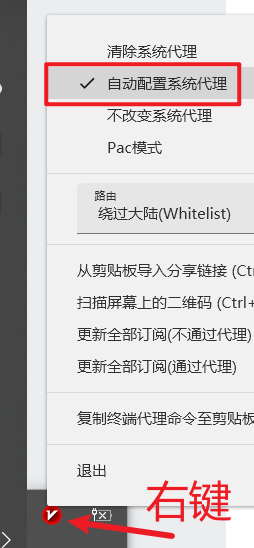
After configuring it, double-click the run.bat file you just created.
If double-clicking directly opens the file with Notepad, it means you failed to modify the extension. Please return to the "Preparations Before Starting" section at the top of this article and select "File name extensions" as instructed.
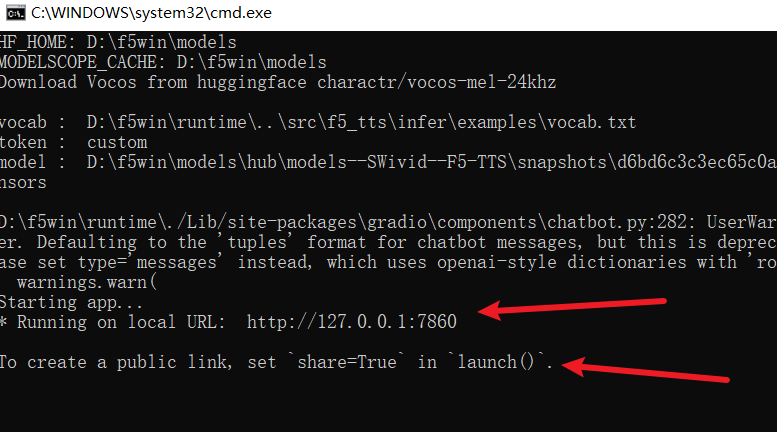
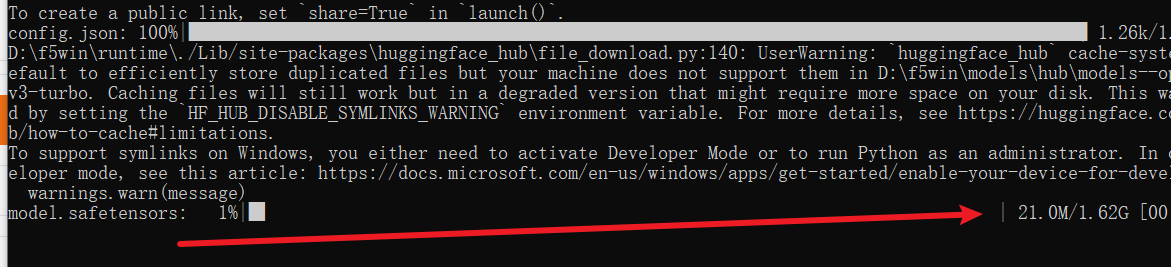
If double-clicking opens a black window, it will start downloading models to the
D:\f5win\modelsfolder.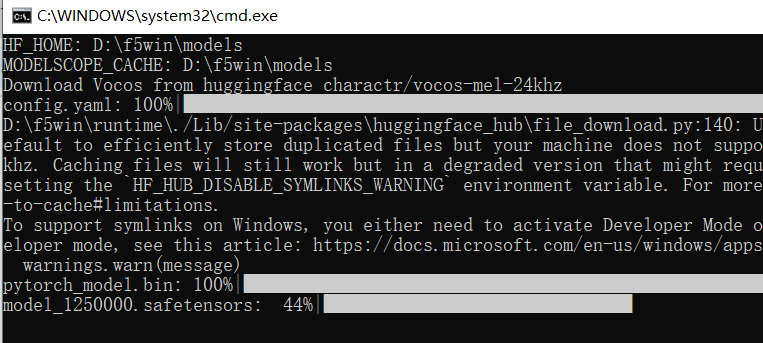
If an error similar to the one below appears, it means you have not configured scientific internet access correctly or have not set it as a system proxy, resulting in a failure to connect to Hugging Face to download the models.
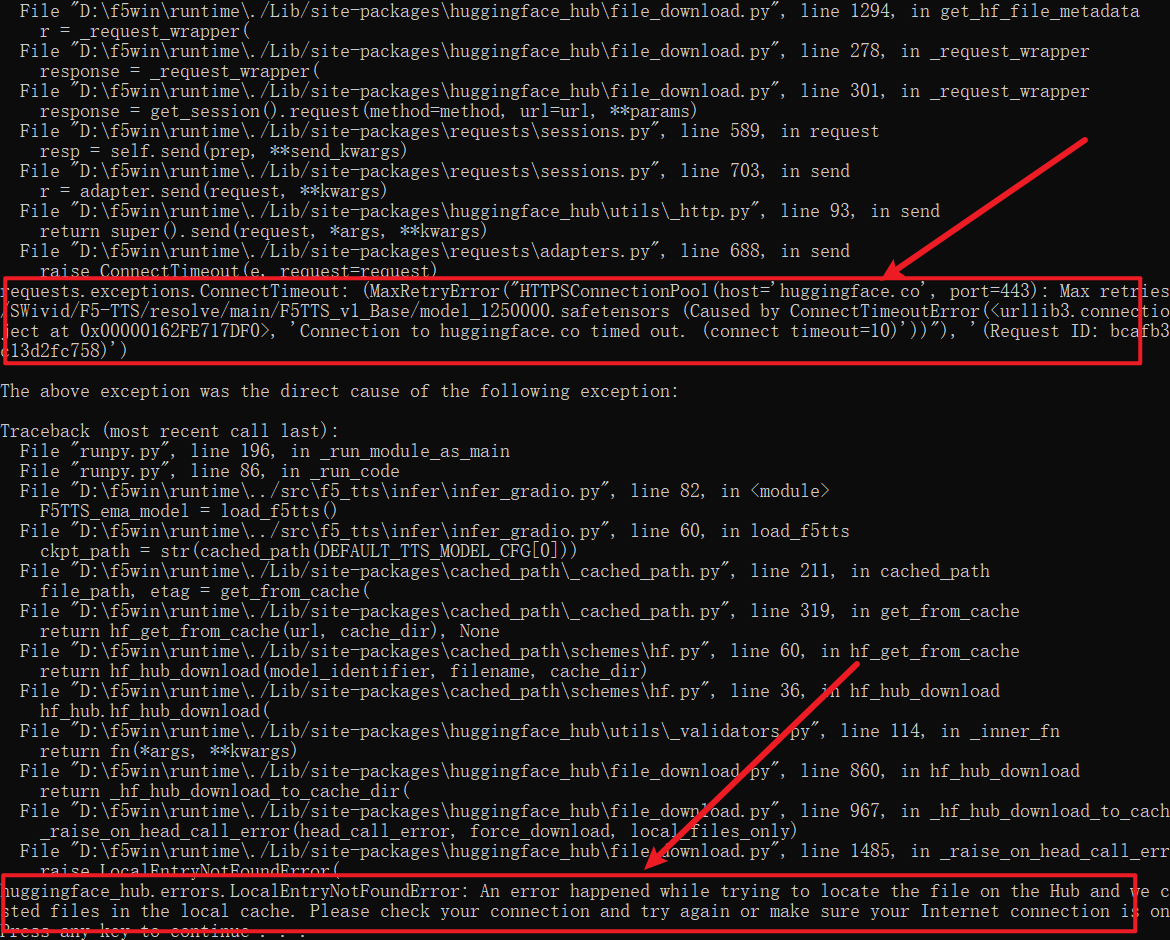
Sometimes, the download fails halfway through. The biggest reason is that your proxy node is unstable. Please replace it with a more stable proxy or node.
After the models are downloaded, the browser window will open automatically.
7. Execute a Cloning Task Once to Download the Whisper Model
When performing voice cloning, if the corresponding text for the reference audio is not provided, F5-TTS will automatically download the Whisper model from Hugging Face. To pack everything completely, we need to download it in advance.
In the Web window that opens automatically, select a clean reference audio of 5-10 seconds, enter the text you want to synthesize (e.g., "Hello, friend"), and then click "Synthesize."
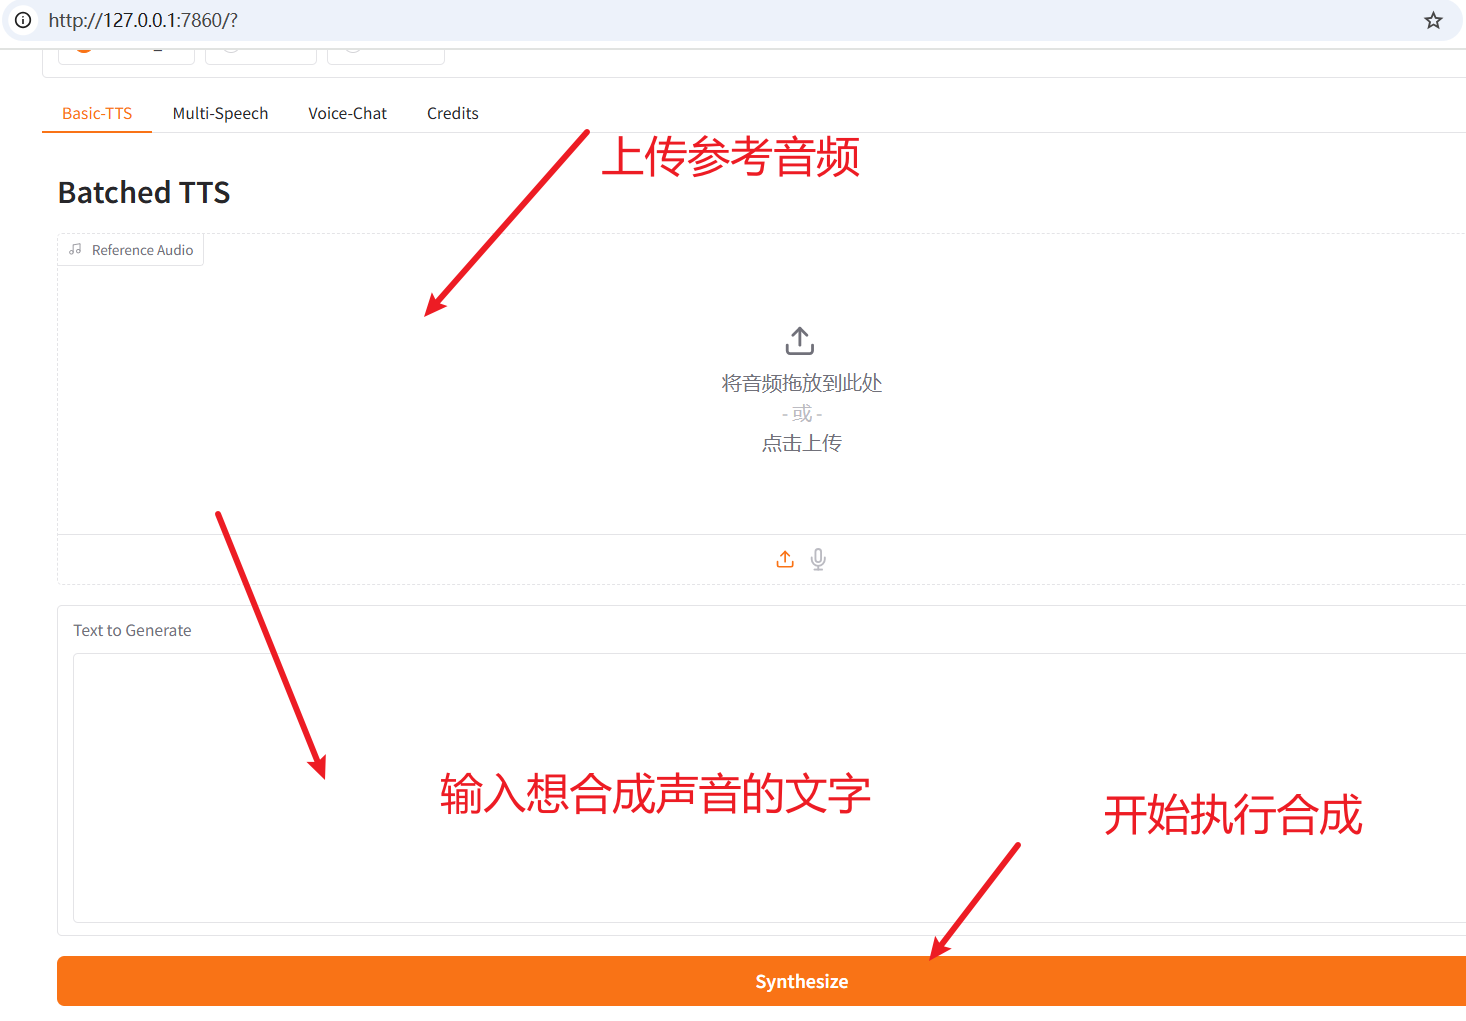
This will start downloading the Whisper model.
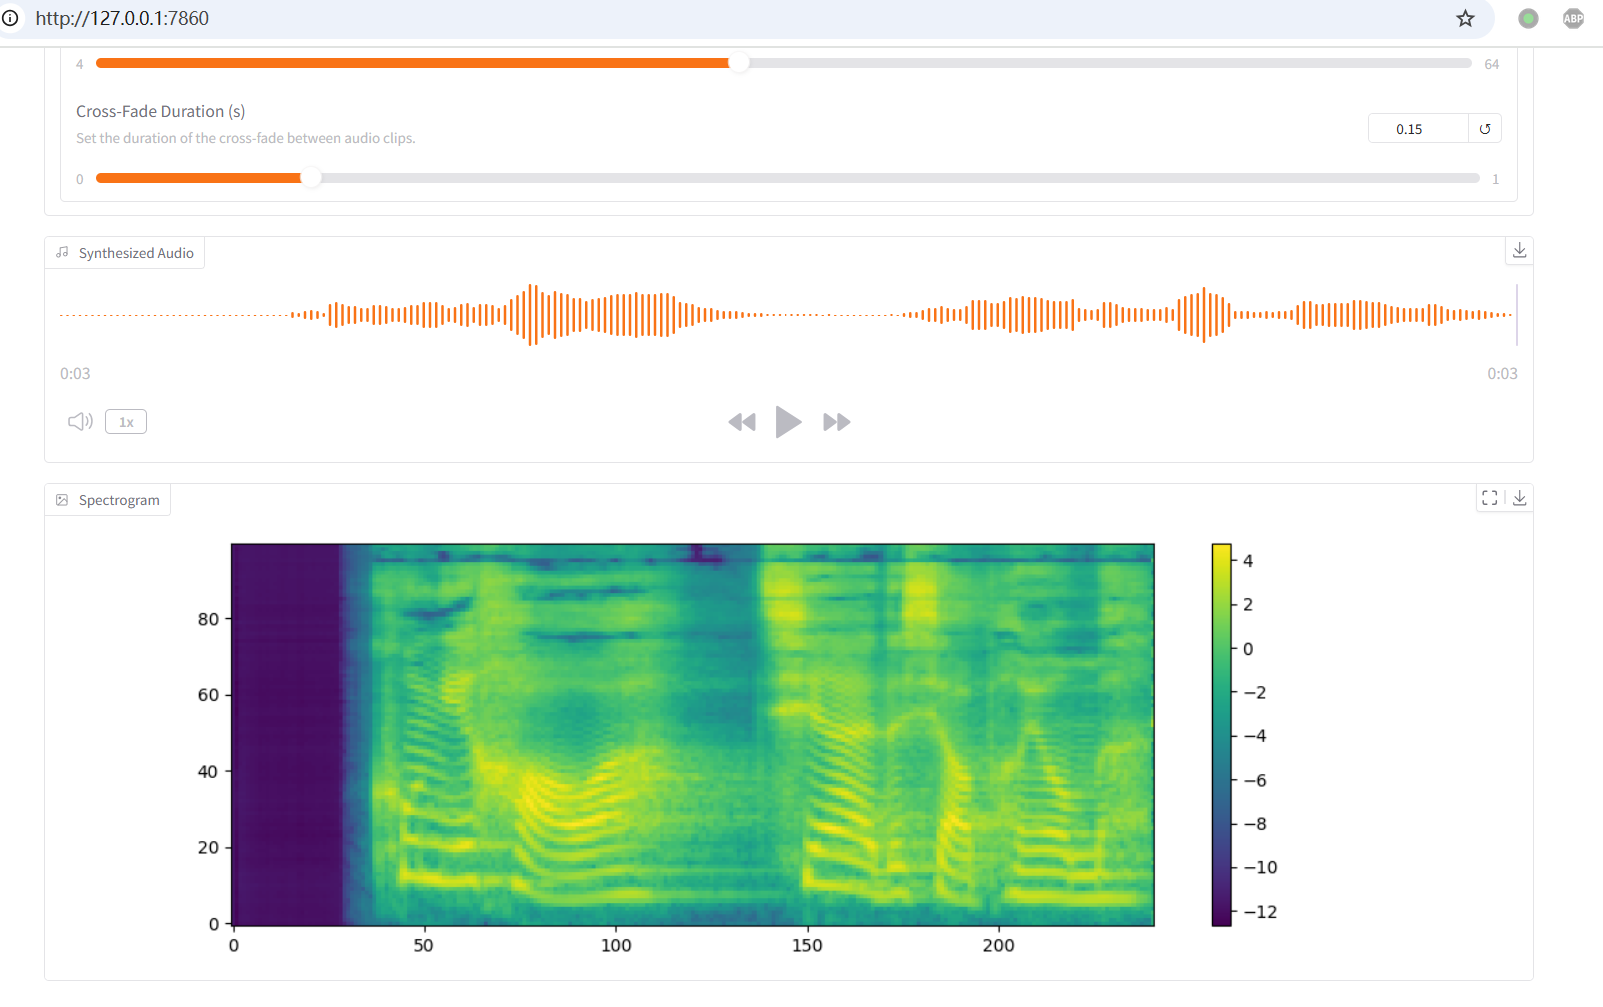
When the synthesis is successful and there are no errors, you can start packaging the project into a portable package.
8. Compress into a Portable Package
- Before compressing, you can rename
run.battoClick Me to Start.batto make it easier for novice users to understand. - Compress the entire
D:\f5winfolder into a zip file, or compress it into a smaller 7z file. - Share the compressed package with others. After they extract it, they can double-click
run.bat(orClick Me to Start.bat) to use it.
9. How to Create Portable Packages for Other AI Projects
Most Python-based open-source projects on GitHub can be packaged using a similar method. The main differences are in the following three points:
Python Version: Python 3.10 is the most common version and is suitable for most projects. If the project has special requirements (such as 3.11 or 3.12), you can find the corresponding version of
Windows embeddable package (64-bit)on this page: https://www.python.org/downloads/windows/. Be sure not to download the exe installer.Content of the
python310._pthfile:./Lib/site-packagesis still required.- Add other paths according to the actual situation of the project.
- If the project has a code directory named
cfg, add a line../cfg. - If the project has a
srcdirectory and there are other folders undersrc, continue to add../src/folder_name.
Startup command of the
run.batscript:- You only need to modify this line of code:
"%~dp0runtime\python" -m f5_tts.infer.infer_gradio --inbrowser - Keep the
"%~dp0runtime\python"part unchanged, and change the part after it to the command that starts the corresponding project (not includingpython). - If you have any questions, you can give the content of
run.batand the startup command of the corresponding project to AI and let it imitaterun.batto give a new startup script. Remember to tell AI to use the Python interpreter inrun.bat.
- You only need to modify this line of code: