Google Colab is a free cloud-based programming environment. You can think of it as a computer in the cloud where you can run code, process data, and even perform complex AI calculations, such as quickly and accurately converting your audio and video files into subtitles using large models.
This article will guide you step-by-step on how to use pyVideoTrans to transcribe audio and video into subtitles on Colab. Even if you don't have any programming experience, that's okay. We'll provide a pre-configured Colab notebook, and you only need to click a few buttons to complete the process.
Preparation: Magic Internet Access and a Google Account
Before you start, you'll need two things:
- Magic Internet Access: For various reasons, Google services are not directly accessible in China. You need to use some special methods to access Google websites.
- Google Account: You need a Google account to use Colab, and registration is completely free. With a Google account, you can log in to Colab and use its services.
Make sure you can open Google https://google.com
Open the Colab Notebook
After ensuring you can access Google websites and log in to your Google account, click the following link to open the Colab notebook we've prepared for you:
https://colab.research.google.com/drive/1kPTeAMz3LnWRnGmabcz4AWW42hiehmfm?usp=sharing
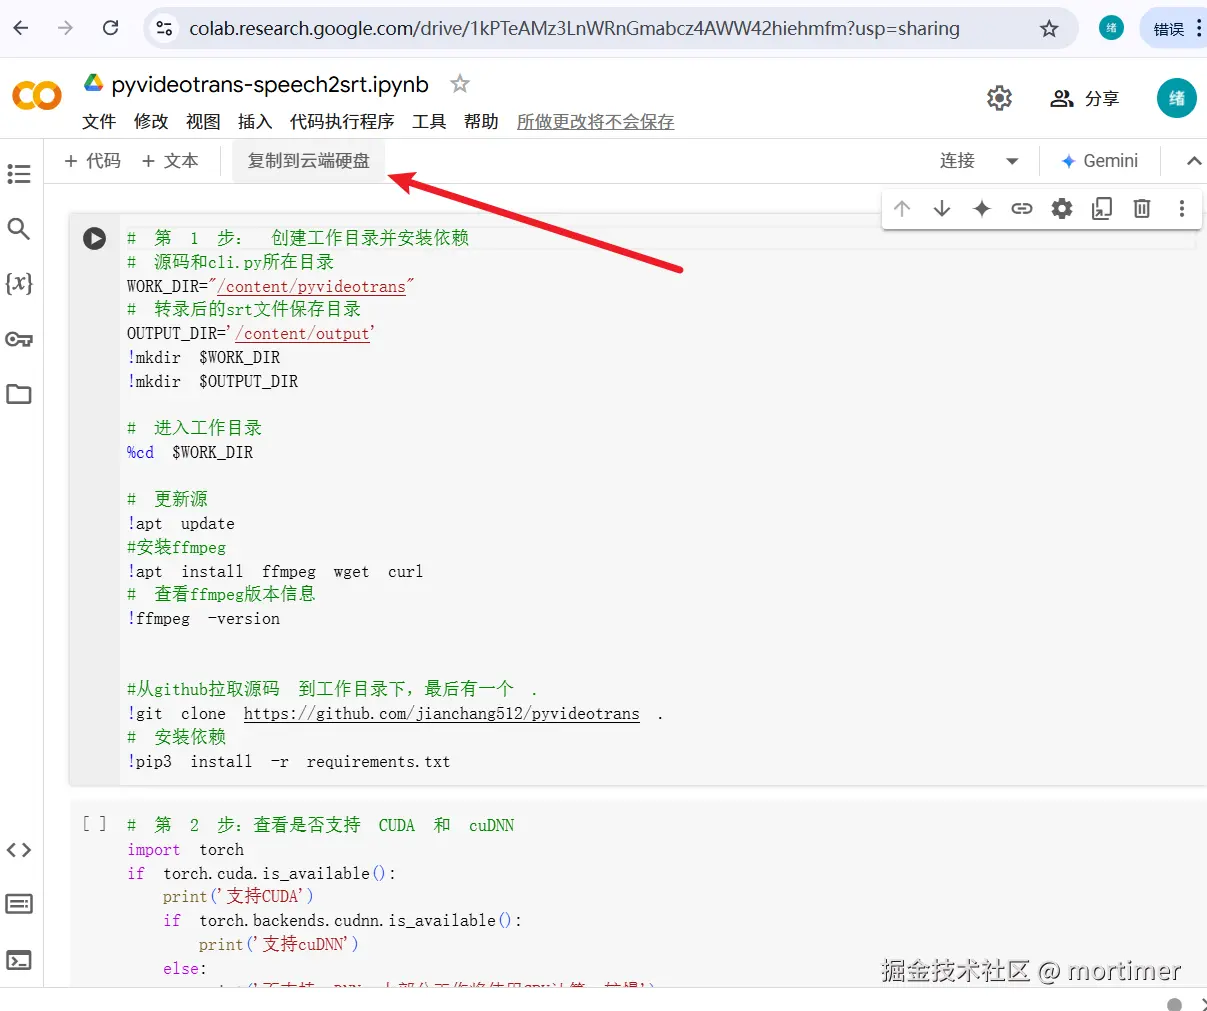
You'll see an interface similar to the image below. Since this is a shared notebook, you need to copy it to your own Google Drive before you can modify and run it. Click "Copy to Drive" in the upper left corner. Colab will automatically create a copy for you and open it.
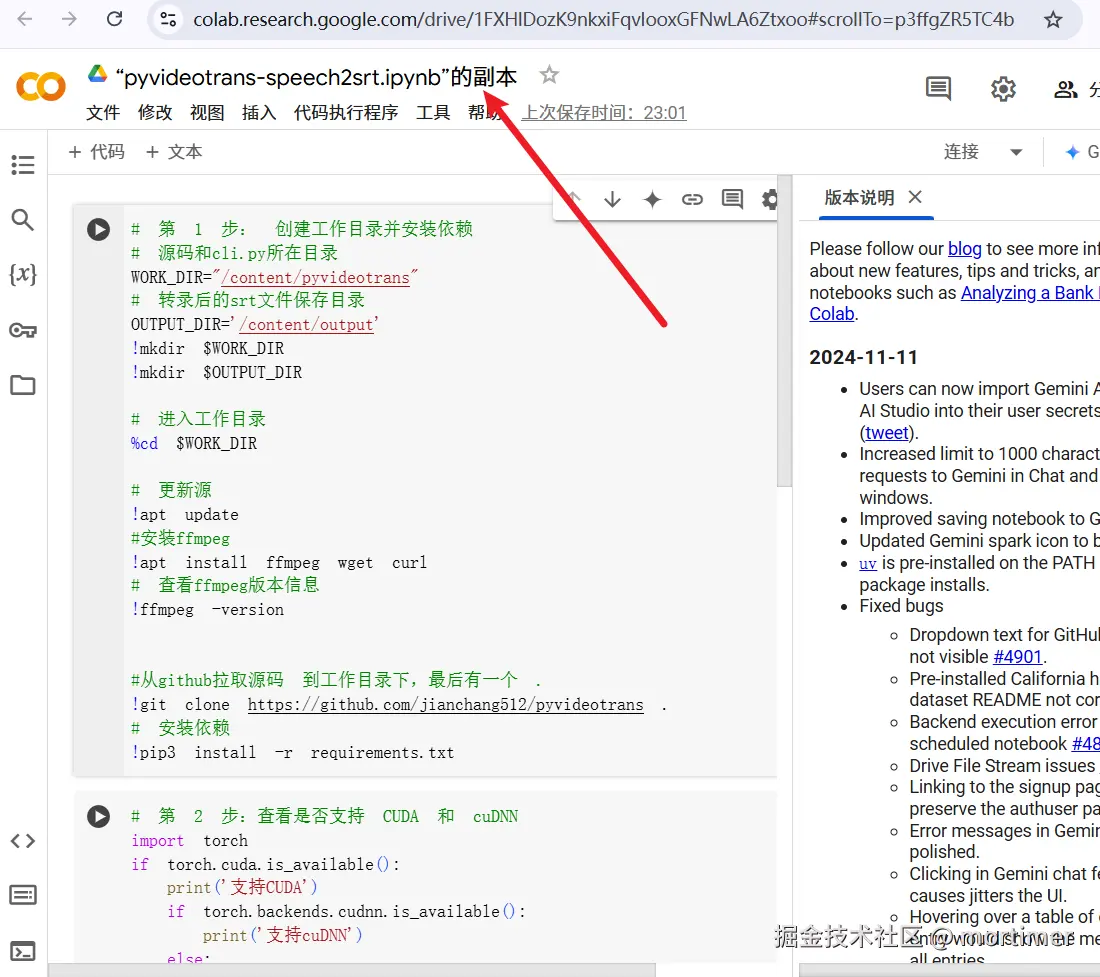
The created page is as follows:
Connect to GPU/TPU
Colab uses CPU by default to run code. To speed up transcription, we need to use a GPU or TPU.
Click "Runtime" -> "Change runtime type" in the menu bar, and then select "GPU" or "TPU" in the "Hardware accelerator" drop-down menu. Click "Save".
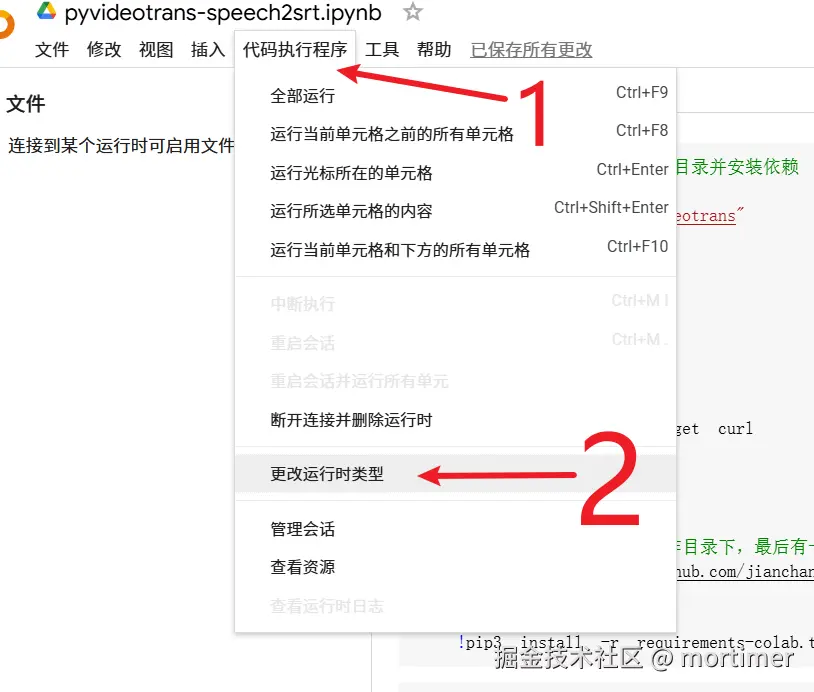
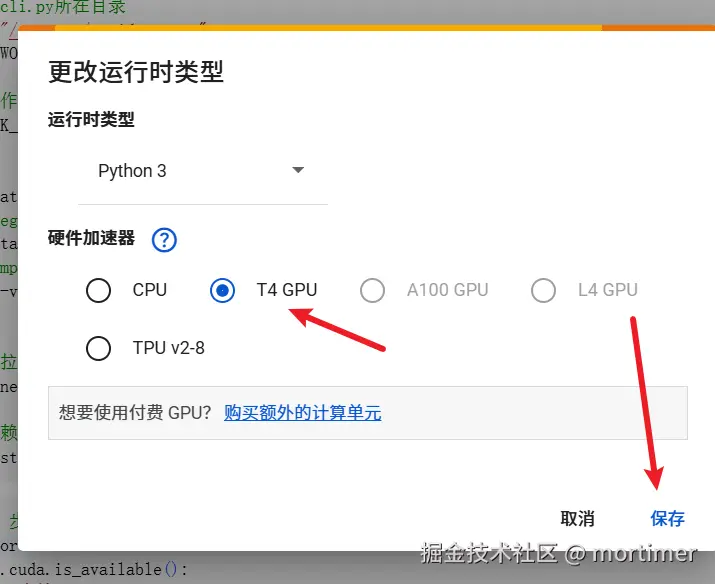
Once saved, you're all set. If a dialog box pops up, choose "Allow," "Agree," etc.
It's very simple, divided into three steps.
1. Pull the Source Code and Install the Environment
Find the first code block (the gray area with a play button) and click the play button to execute the code. This code will automatically download and install pyvideotrans and other software it needs.
Wait for the code to finish executing, and you'll see the play button turn into a checkmark. You can ignore any red error messages that may appear during the process.

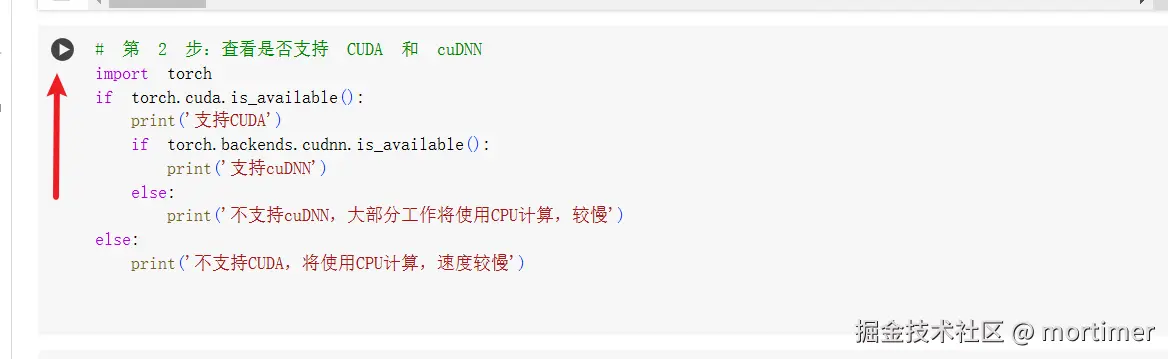
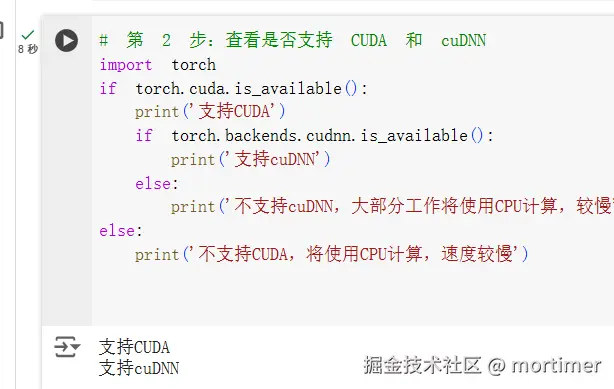
2. Check if GPU/TPU is Available
Run the second code block to confirm that the GPU/TPU is connected successfully. If the output shows support for CUDA, it means the connection is successful. If the connection is not successful, please go back and double-check whether you have connected to the GPU/TPU.
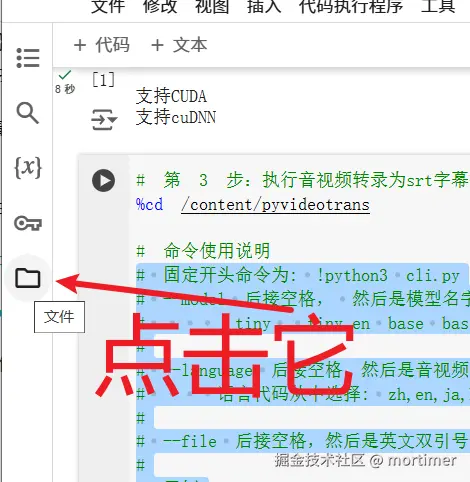
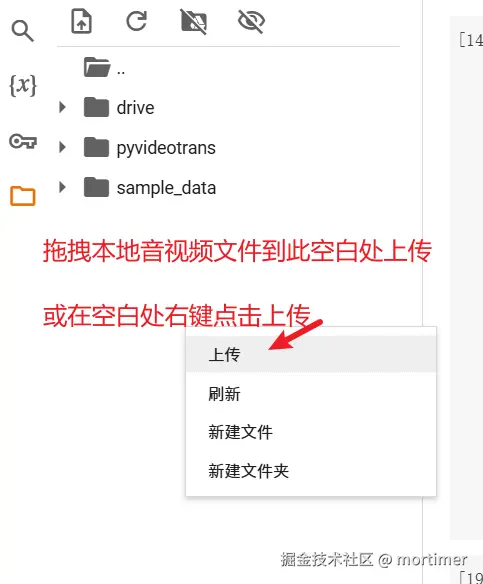
3. Upload Audio/Video and Execute Transcription
- Upload File: Click the file icon on the left side of the Colab interface to open the file browser.
Simply drag and drop your audio or video files from your computer to the blank space in the file browser to upload them.
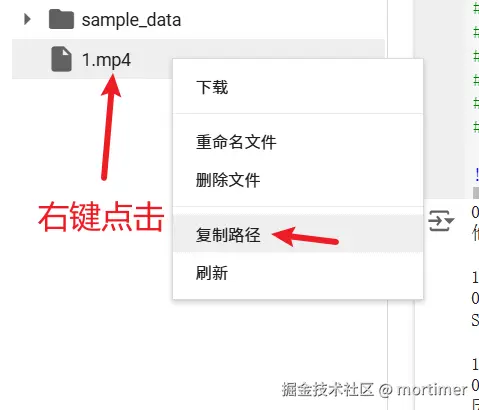
- Copy File Path: After uploading, right-click on the file name and select "Copy path" to get the full path of the file (e.g.,
/content/your_file_name.mp4).
- Execute Command
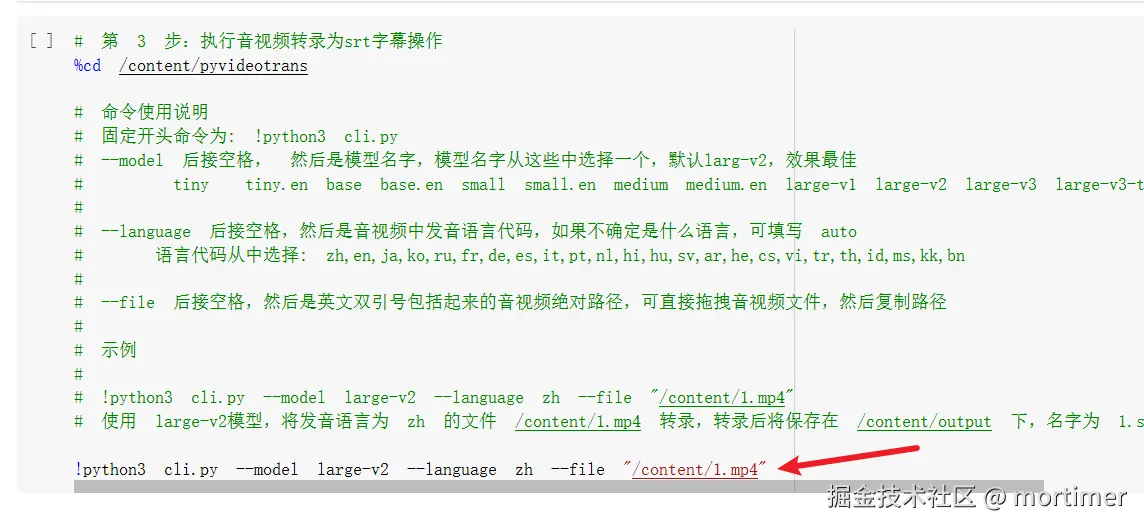
For example, take the following command:
!python3 cli.py --model large-v2 --language zh --file "/content/1.mp4"
!python3 cli.pyThis is a fixed starting command, including the exclamation mark.After
cli.py, you can add control parameters, such as which model to use, the language of the audio/video, whether to use GPU or CPU, and where to find the audio/video file to be transcribed. Only theaudio/video file pathis required; other parameters can be omitted and the default values will be used.
Suppose your video is named 1.mp4. After uploading, copy the path, and enclose the path in double quotes on both sides to prevent errors due to spaces in the name.
!python3 cli.py --file "paste the copied path here" After pasting and replacing, it becomes !python3 cli.py --file "/content/1.mp4"
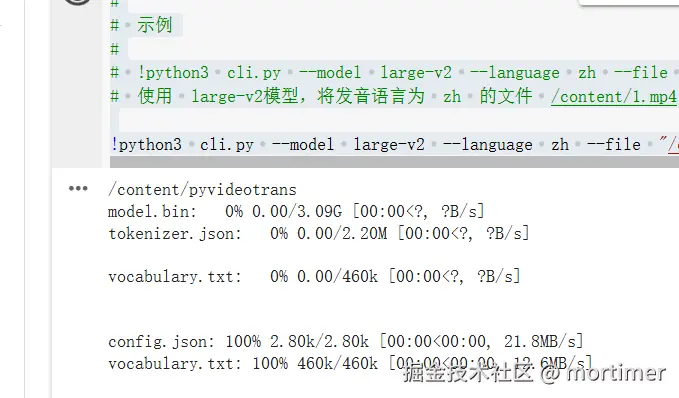
Then click the execute button and wait for it to finish. The required model will be automatically loaded, and the download speed is fast.
The default model is
large-v2. What if you want to change it to the large-v3 model? Execute the following command:
!python3 cli.py --model large-v3 --file "paste the copied path"What if you also want to set the language to Chinese?
!python3 cli.py --model large-v3 --language zh --file "paste the copied path"
Where to Find the Transcription Results
After the execution starts, you will find an output folder appearing in the folder list on the left. All transcription results are located here, named after the original audio/video file name.
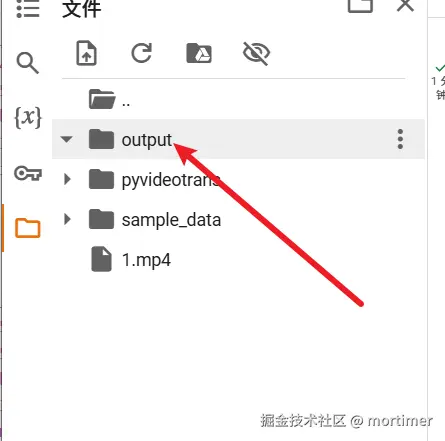
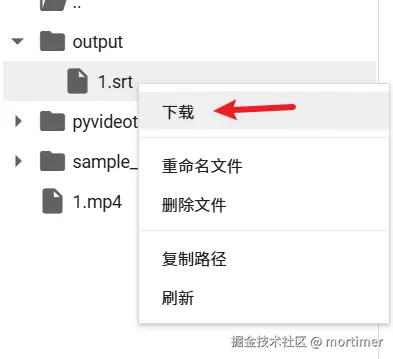
Click on the output name to view all the files inside. Right-click on a file, click "Download," and you can download it to your local computer.
Precautions
- Magic Internet Access Magic Internet Access
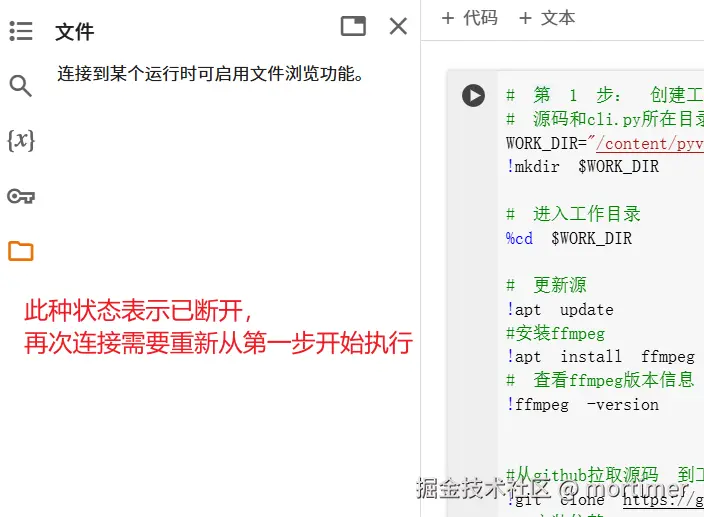
- The uploaded files and the generated srt files are only temporarily stored in Colab. When the connection is disconnected or the Colab free time limit is reached, the files will be automatically deleted, including all the pulled source code and all installed dependencies. Therefore, please download the generated results in time.
- When you open Colab again, or when the connection is disconnected and reconnected, you need to start from the first step again.
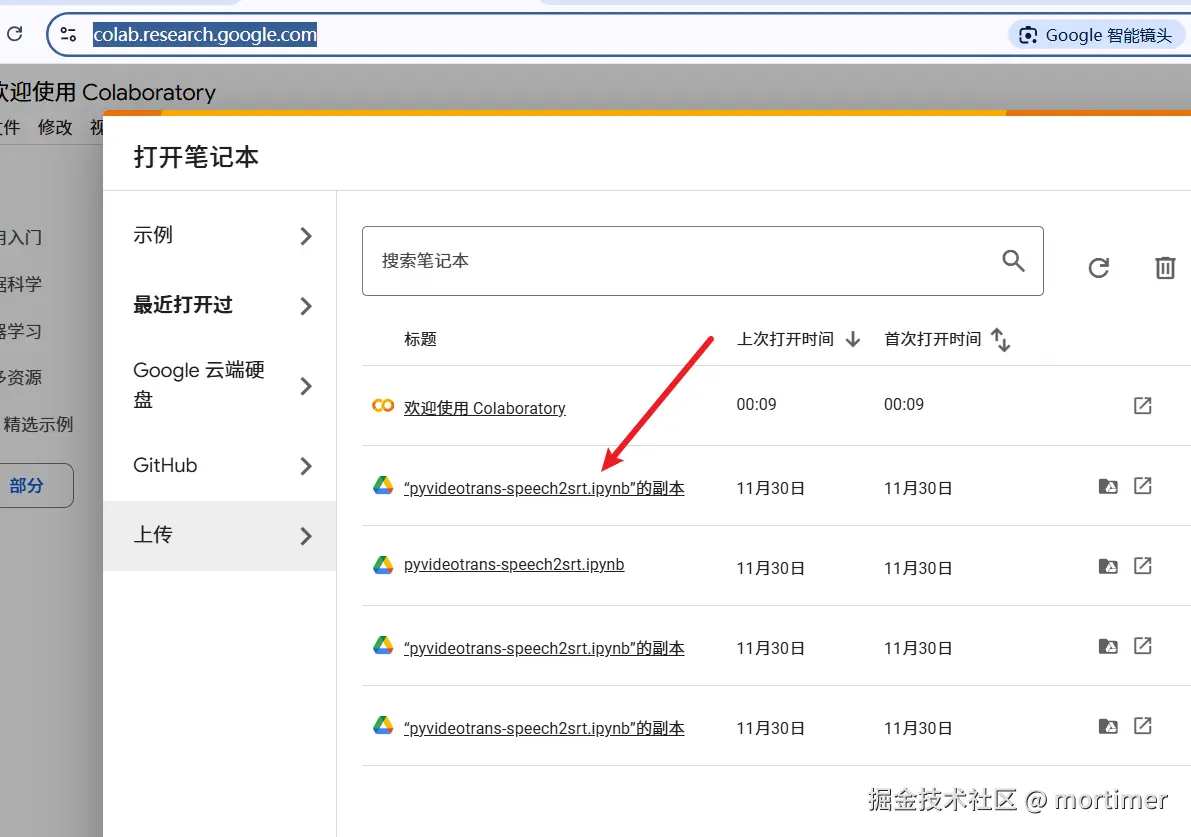
 4. If you close the browser, where can you find it again next time?
Open this address https://colab.research.google.com/
Click on the name you used last time.
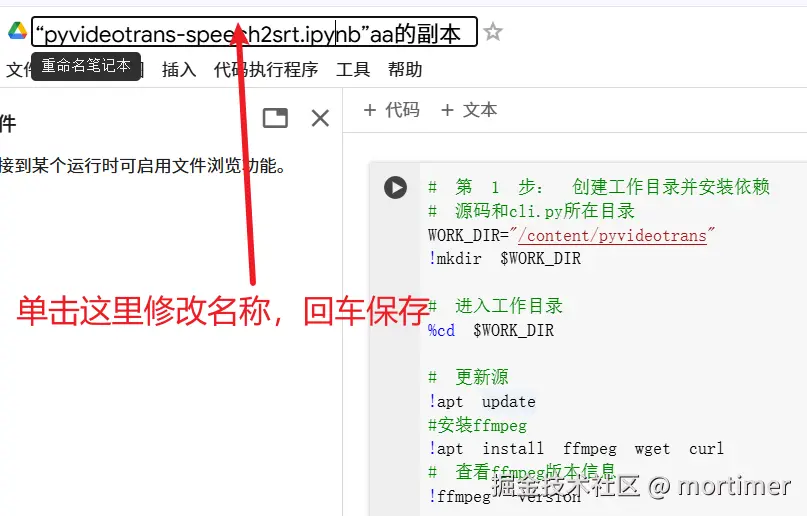
- As shown above, the name is hard to remember. How do I change it?